1. GOATS Command Line Interface
The GOATS CLI provides everything you need to install a new GOATS project and run
it locally. All commands support --help and display clear, colorized output.
The screenshots below show exactly what users will see.
1.1. goats
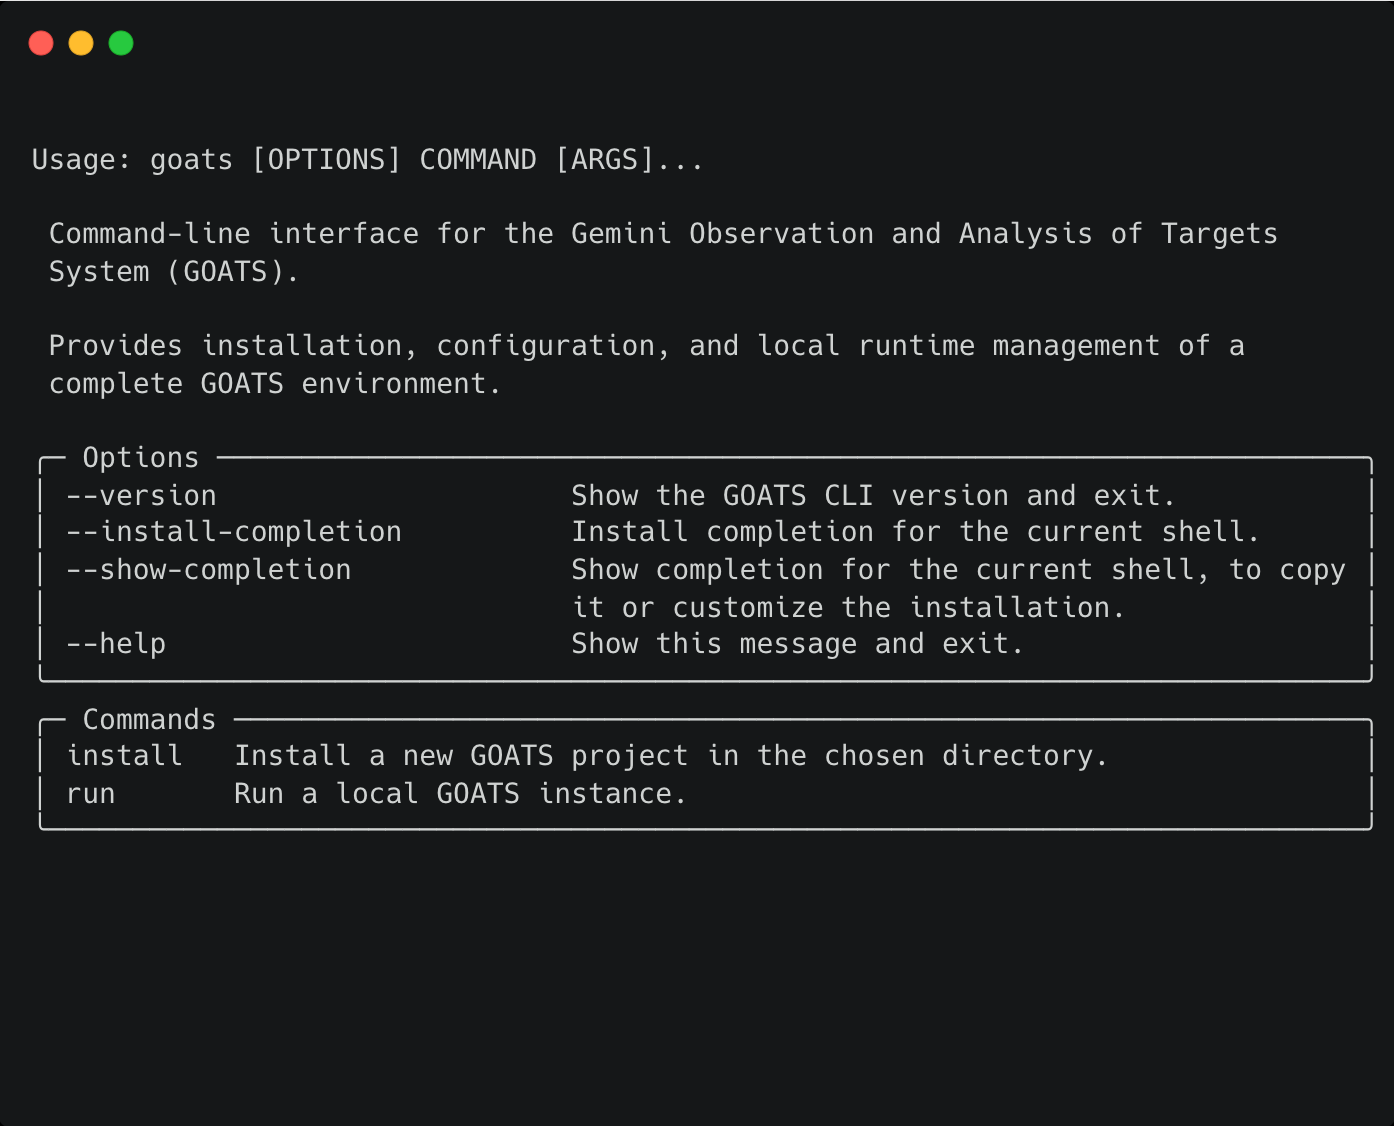
Running goats with no arguments lists the available commands and options.
From here, users can install a new GOATS project or start an existing one.
1.2. goats --version
Displays the installed GOATS CLI version.
1.3. goats install
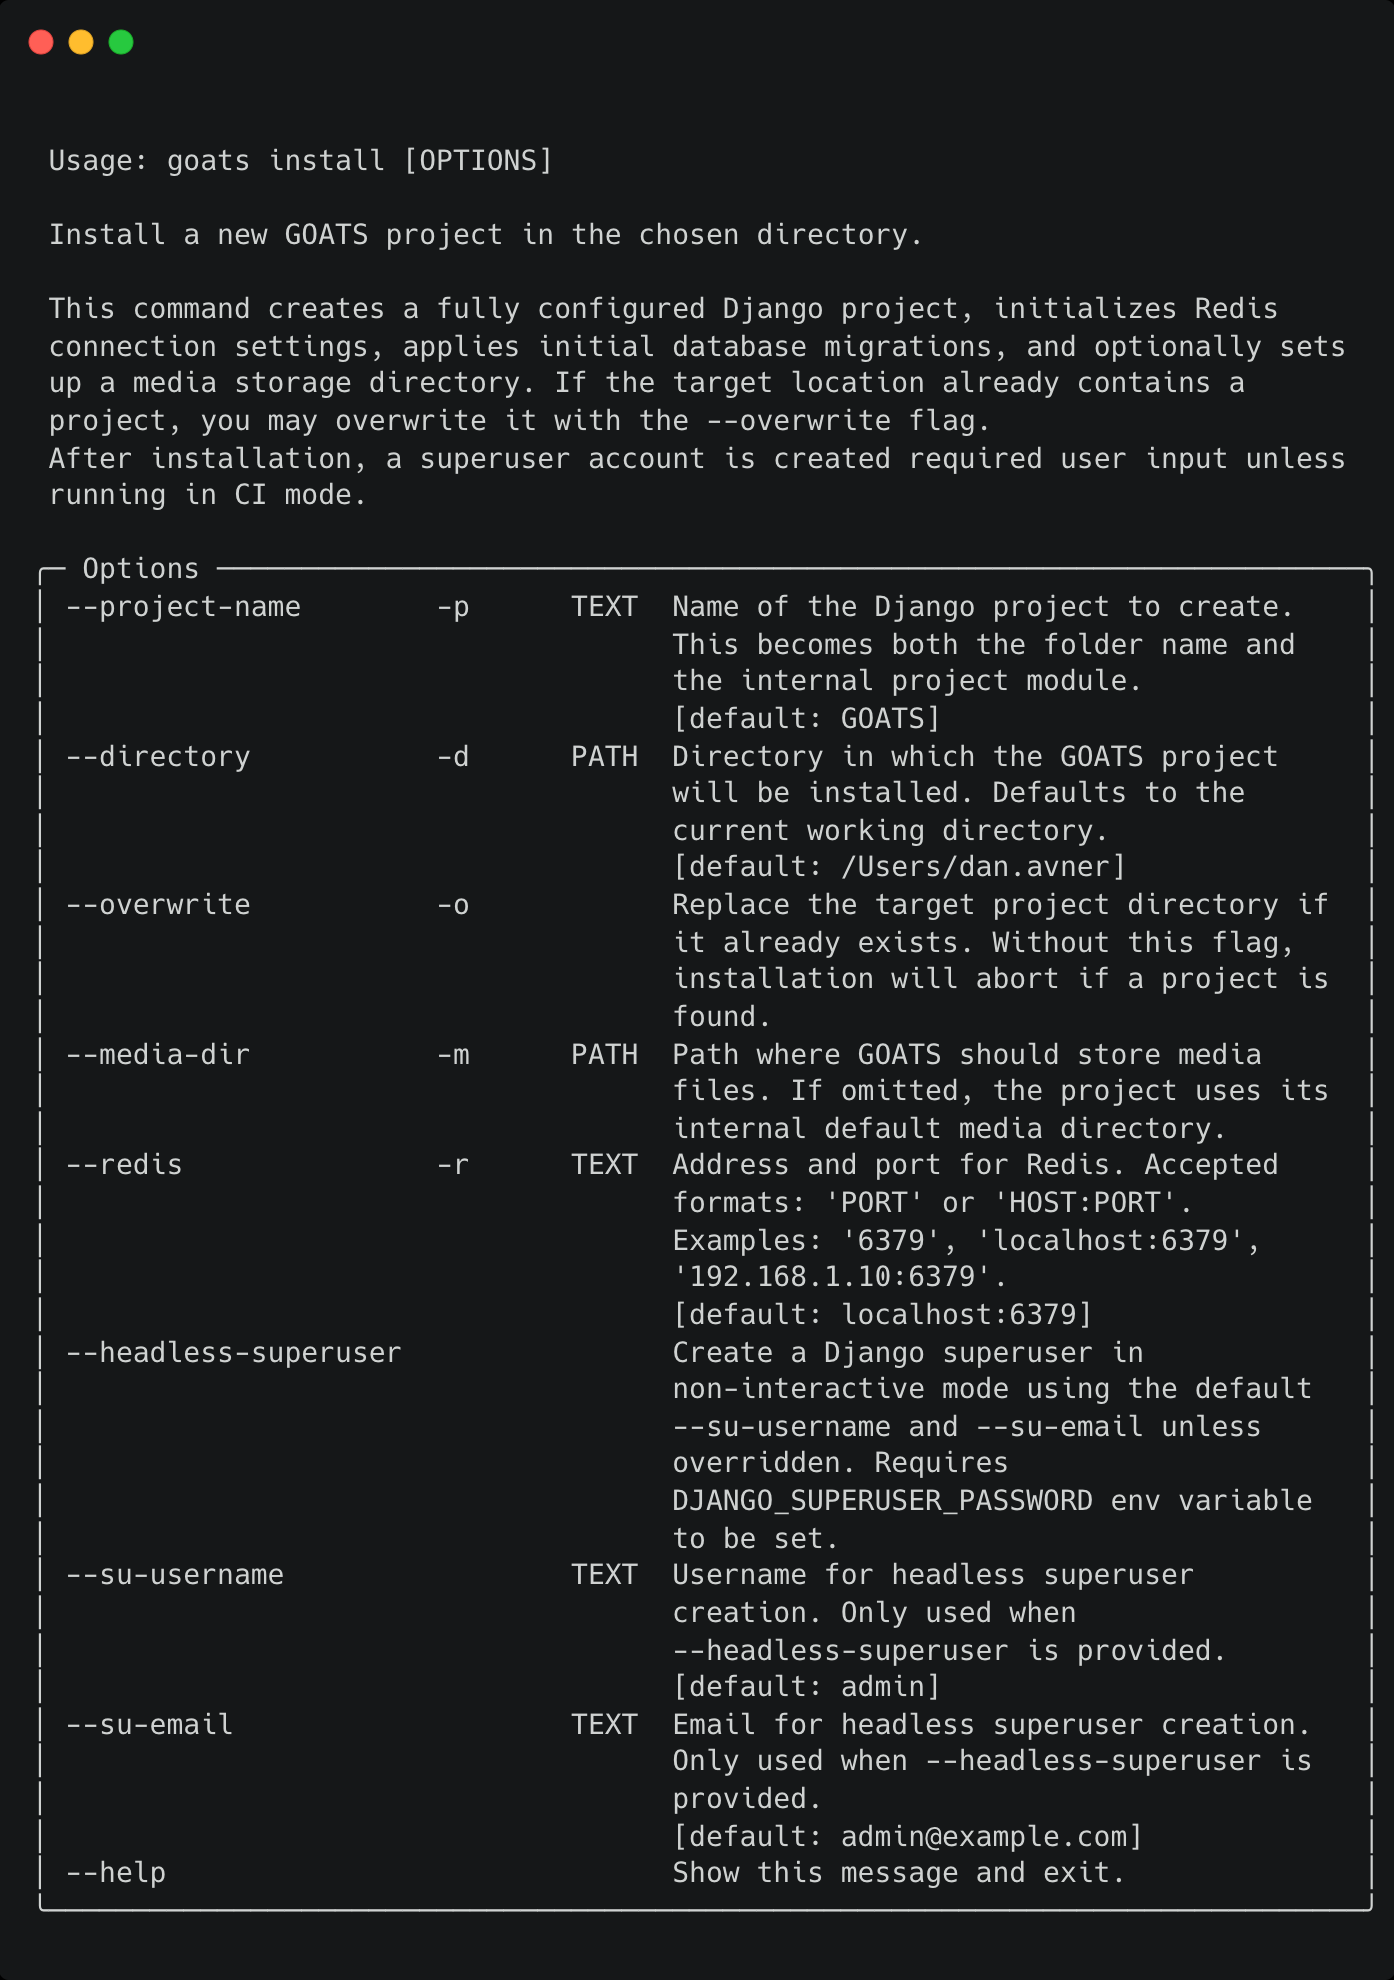
Use this command to create a complete GOATS project in the directory of your choice.
What it does:
Creates a ready-to-run Django-based GOATS project.
Sets up project files, Redis configuration, and the initial database.
Lets you choose a custom media directory, or defaults internally.
Creates a superuser (interactive or headless).
Can overwrite an existing installation if
--overwriteis provided.
Typical steps for users:
Run
goats install.Follow prompts to finalize setup.
Use the printed “Next steps” to start GOATS.
1.4. goats run
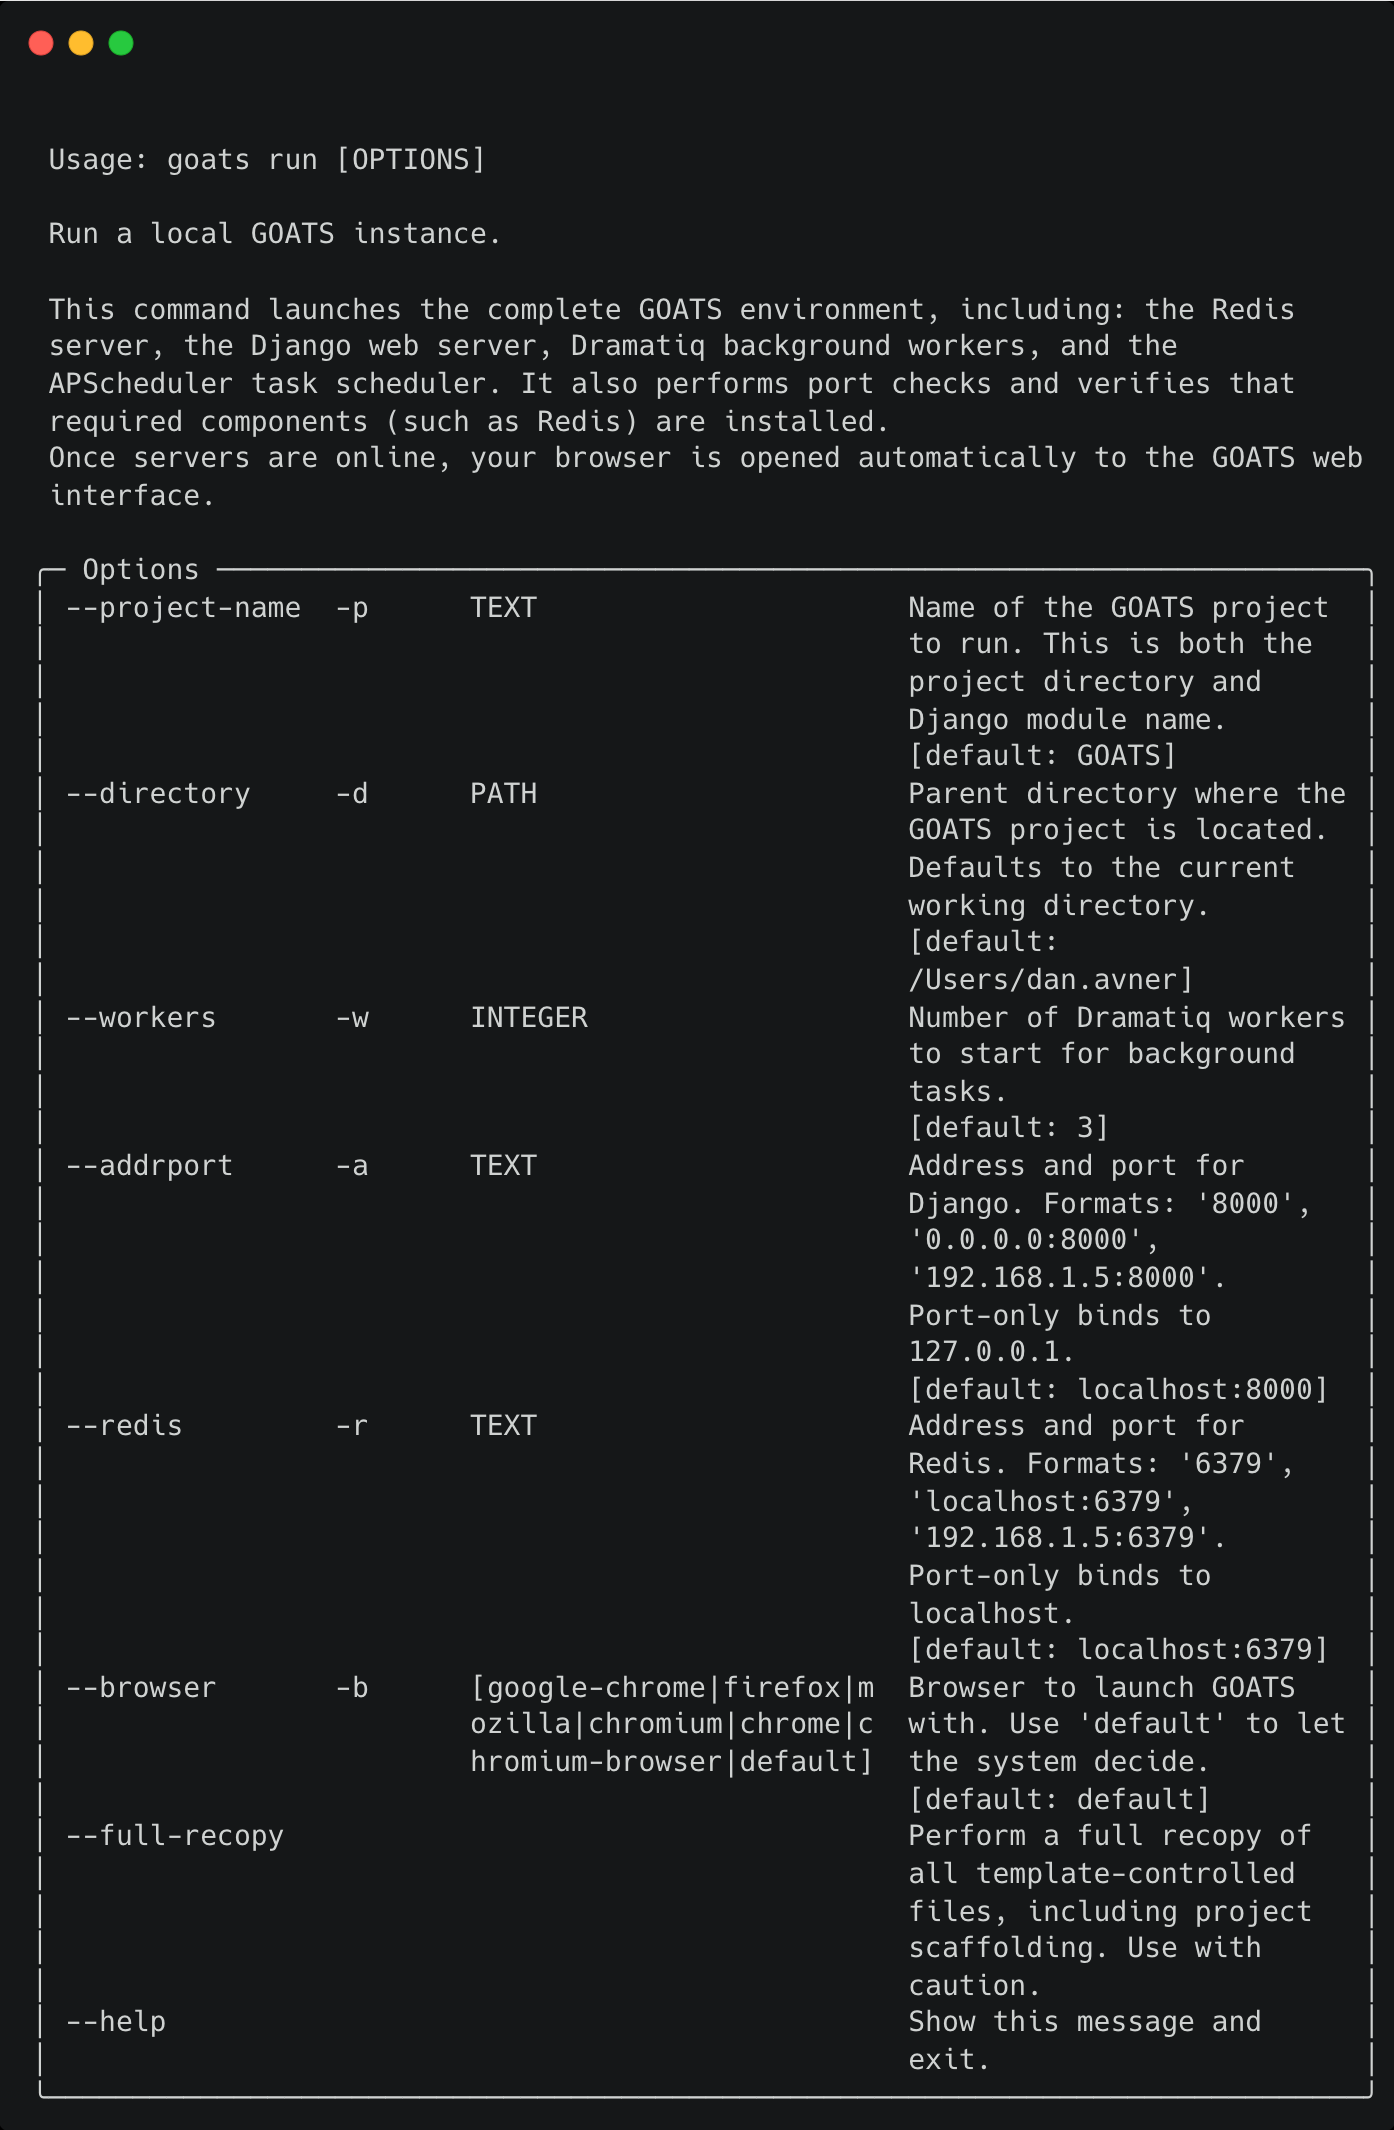
Starts your complete local GOATS environment with one command.
What it does:
- Supports custom host/port, number of workers, and browser preference.
- Checks for port conflicts and verifies Redis is installed.
- Syncs any template-managed GOATS files so your project stays current.
- Starts Redis, the Django development server, background workers, and the scheduler.
- Automatically opens your browser when the system is responsive.
- Cleanly shuts everything down when you press Ctrl+C.
Typical steps:
Run
goats run.GOATS opens automatically in your browser.
Press
Ctrl+Cto shut it all down.